How To Tighten a Loose Garage Door Chain or Belt
A loose garage door opener chain or belt can prevent you from accessing the garage if not addressed in a timely manner.
We get calls from customers every day asking us to service their garage door and opener. Nothing bothers a homeowner more than a loose chain or belt on their automatic opener. Occasionally, it’s a simple adjustment, other times there are more serious issues.
In this article, we will first address some of the most common questions about a loose garage door chain and later in the article we will cover some common questions regarding a loose belt on your garage door opener.
Loose Garage Door Chain Symptoms
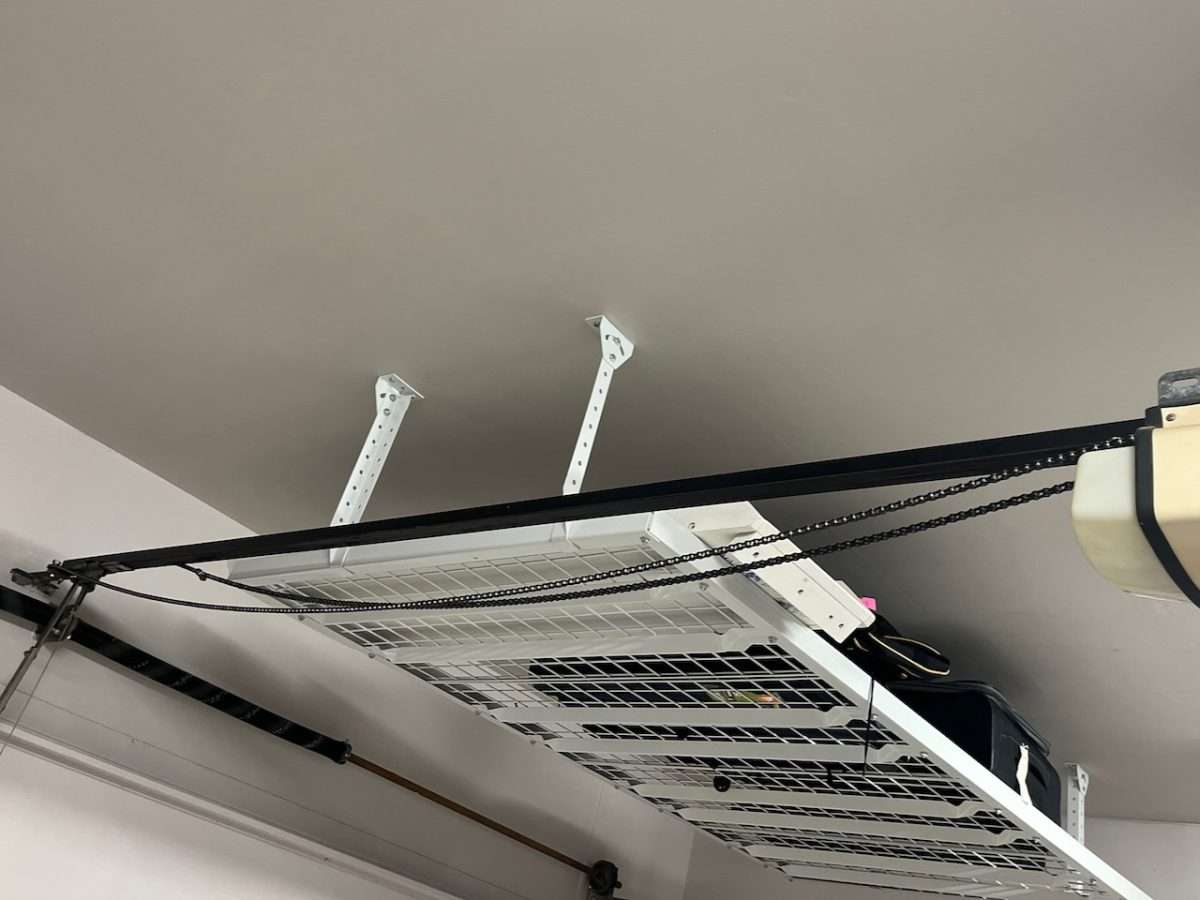
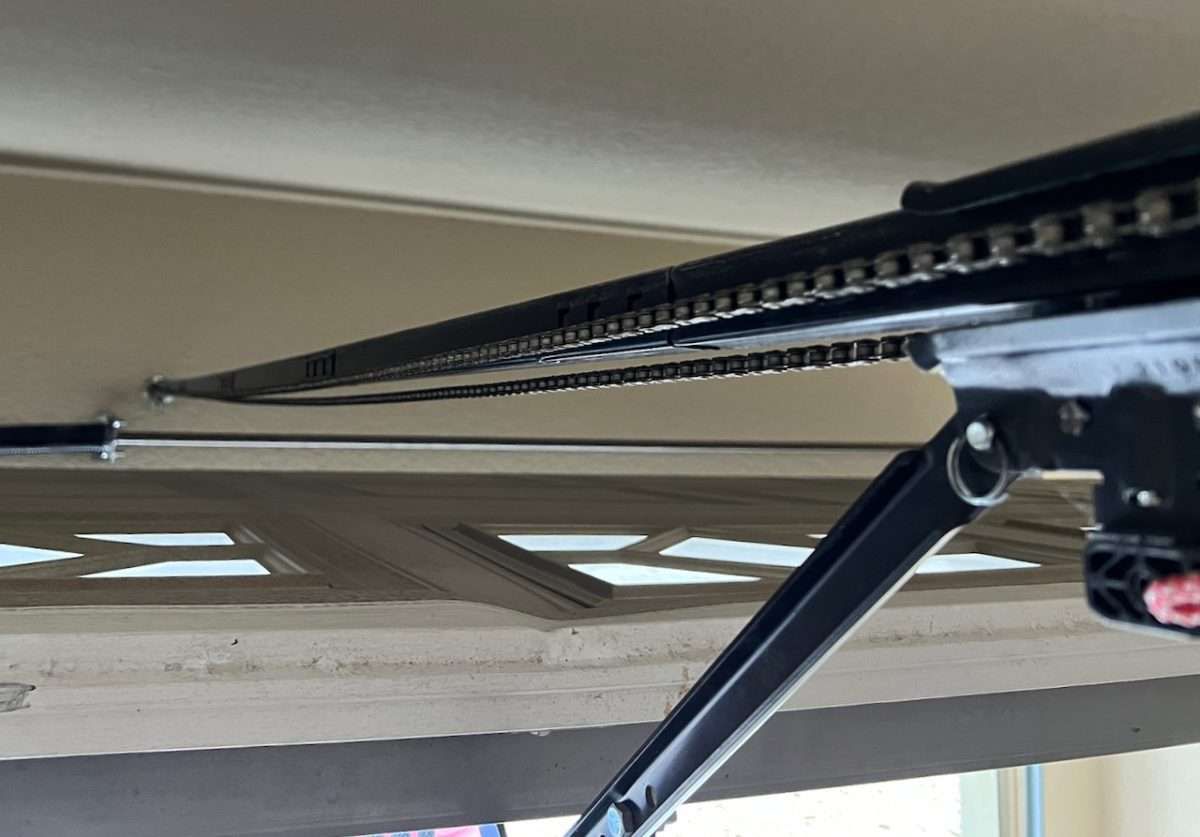
The most common symptom of a loose garage door chain is seeing the chain sagging below the drive rail. The amount of sag will determine the severity of the problem.
A newer chain that is starting to sag most likely just needs a simple adjustment on the tensioner, which can be done with simple tools like open end wrenches or pliers. This will most likely get rid of any rattling or noises you hear as the chain is hitting the rail.
If your chain is hanging way down below the rail, you most likely have a failed drive sprocket or front pulley. We cover these issues in more detail later in this article.
Garage Door Chain Sagging on One Side
If your garage door opener chain is loose on one side of the rail when closed, then your travel limits most likely need to be adjusted. Your opener is going down too far when closing and pushing down right as the motor shuts off. This puts pressure on the chain on one side of the rail, therefore leaving the opposite side loose.
Backing off on the down travel limits will eliminate this issue. It will also help prevent any future issues of your garage door going down, hitting the ground, and going back up. Travel limits will naturally lose their settings and have to be reset, just like any computer, especially newer openers with electronic limits.
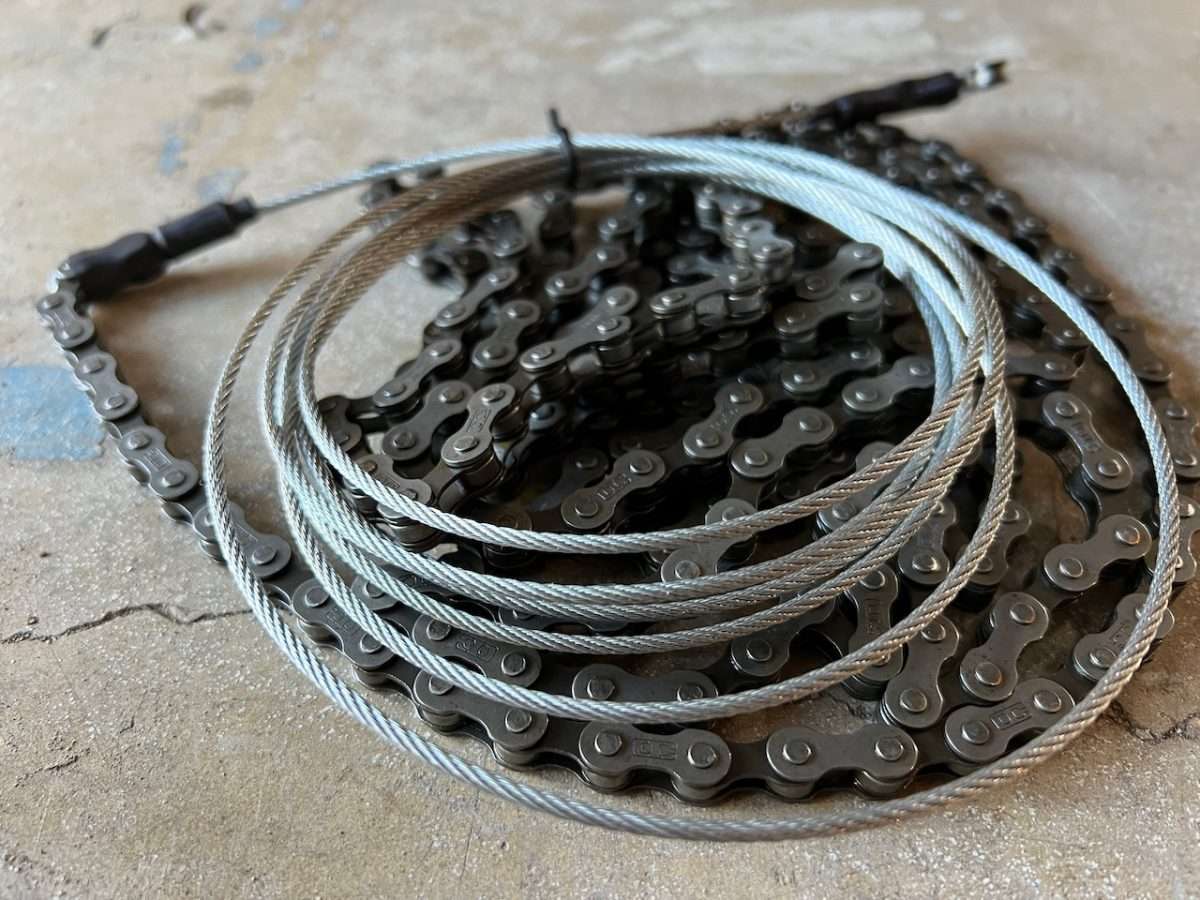
How to Tighten a Garage Door Opener Chain
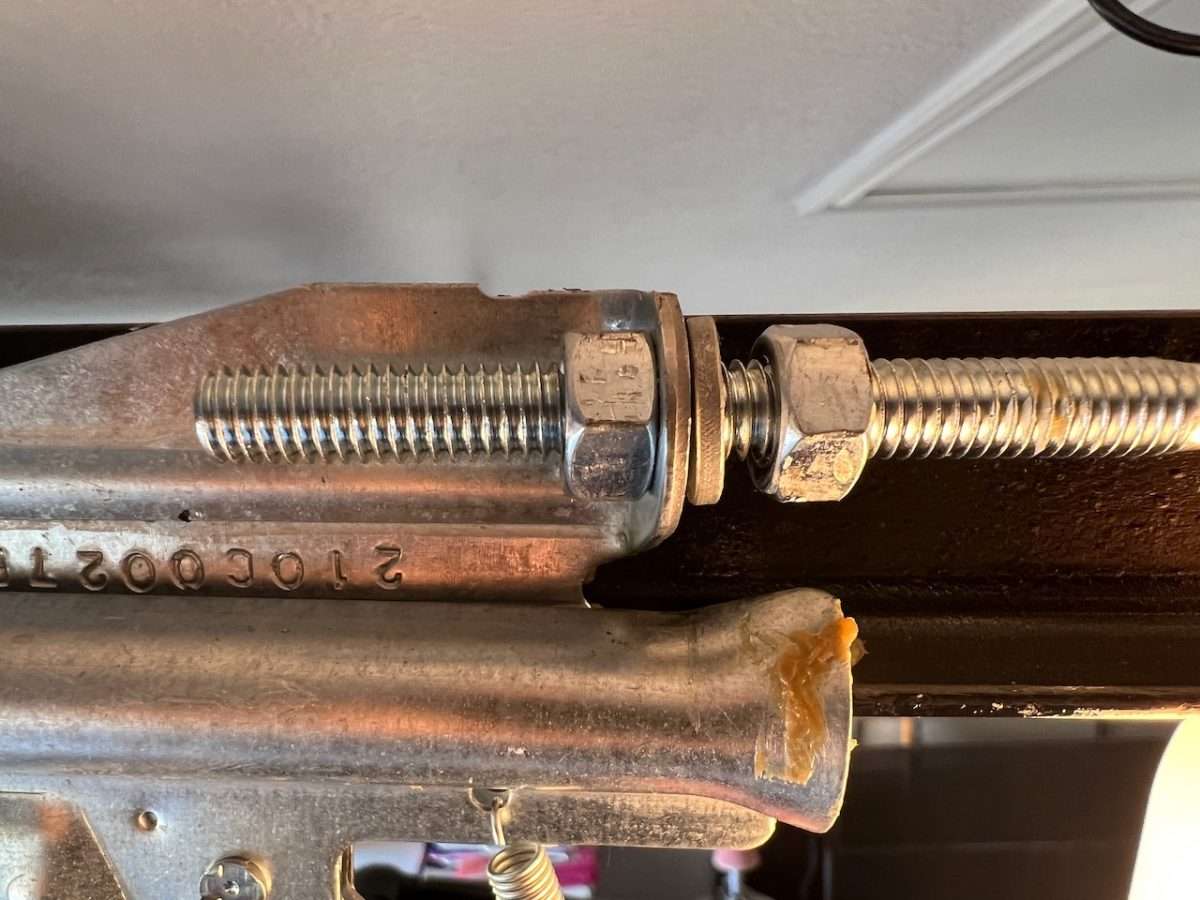
Most chain drive garage door openers feature a tensioner bolt at the end of the chain that allows for adjustments. You can simply loosen or tighten the chain with an open end wrench, pliers, or vise grips.
PRO TIP
Make sure when tightening the chain on your opener that the chain does not twist. The drive chain needs to go around the drive sprocket above the motor, which is why it's important to make sure it is straight and not twisted on either side. If so, it will come off the sprocket during operation.
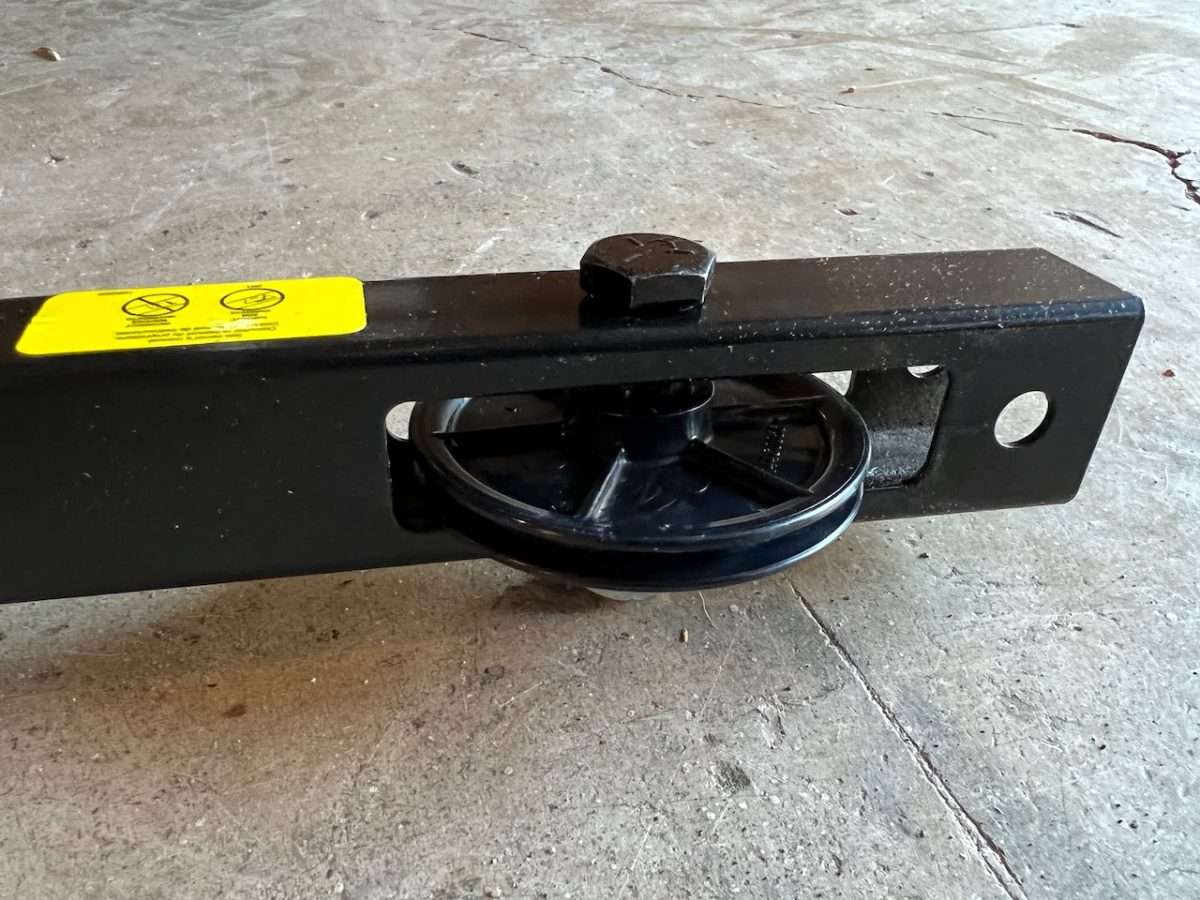
Many Genie and Overhead Door models of garage door openers over the years have featured a bolt at the end of the rail by the header bracket that allows you to tighten the chain or belt. This can usually be done with an open end wrench inserted under the header bracket.
How Tight Should the Garage Door Chain Be?

A garage door chain should rest about 1/4” above the bottom of the drive rail in the center. The chain on your opener does not have to be 100% level. It's ok to have a little sag, which is normal due to the weight of the chain.
What Happens if I Over Tighten the Chain?
If you over tighten the chain on your garage door opener, a few things could happen. First, an over tightened chain will prematurely wear out the drive sprocket or front pulley. The reason is simply because of the amount of pressure and friction that is applied to these parts.
Second, your chain could get louder as it may start vibrating against the rail, which is common on some Linear garage door openers. Finding a middle ground is important to keeping the noise down and prolonging the life of your opener.
Garage Door Chain Keeps Getting Loose?
No Lock Washer on Tensioner
If the chain on your garage door opener keeps getting loose after tightening, first check to make sure you have a lock washer on the chain tensioner. One of the most common mistakes we see on installations is the lock washer is not installed.
You only need one lock washer installed on the chain tensioner, and it’s best to install it on the chain side. This makes the tightening process much smoother as you are not fighting against the jagged edges of the lock washer. This is the most common reason why chains loosen up on new garage door openers.
Chain Drive Sprocket is Failing
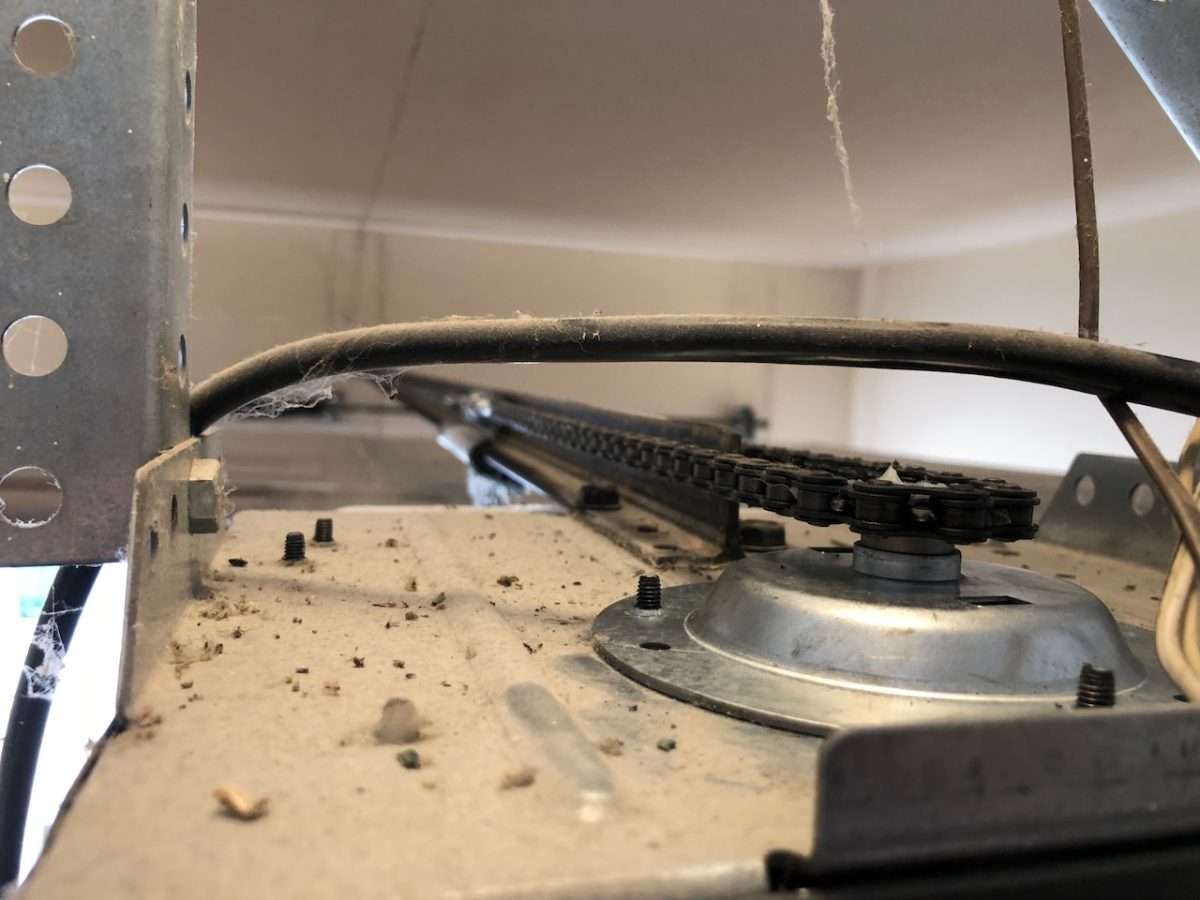
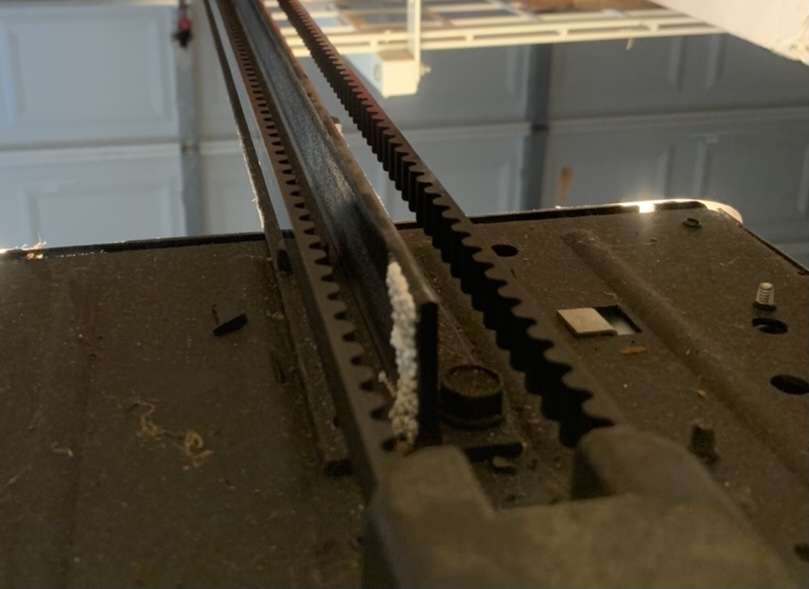
If you have an older garage door opener, and you notice the chain is starting to sag more, the top drive sprocket may be leaning toward the garage door. Drive sprocket shafts are encased in bushings that will eventually wear out and fail. This part will need to be replaced.
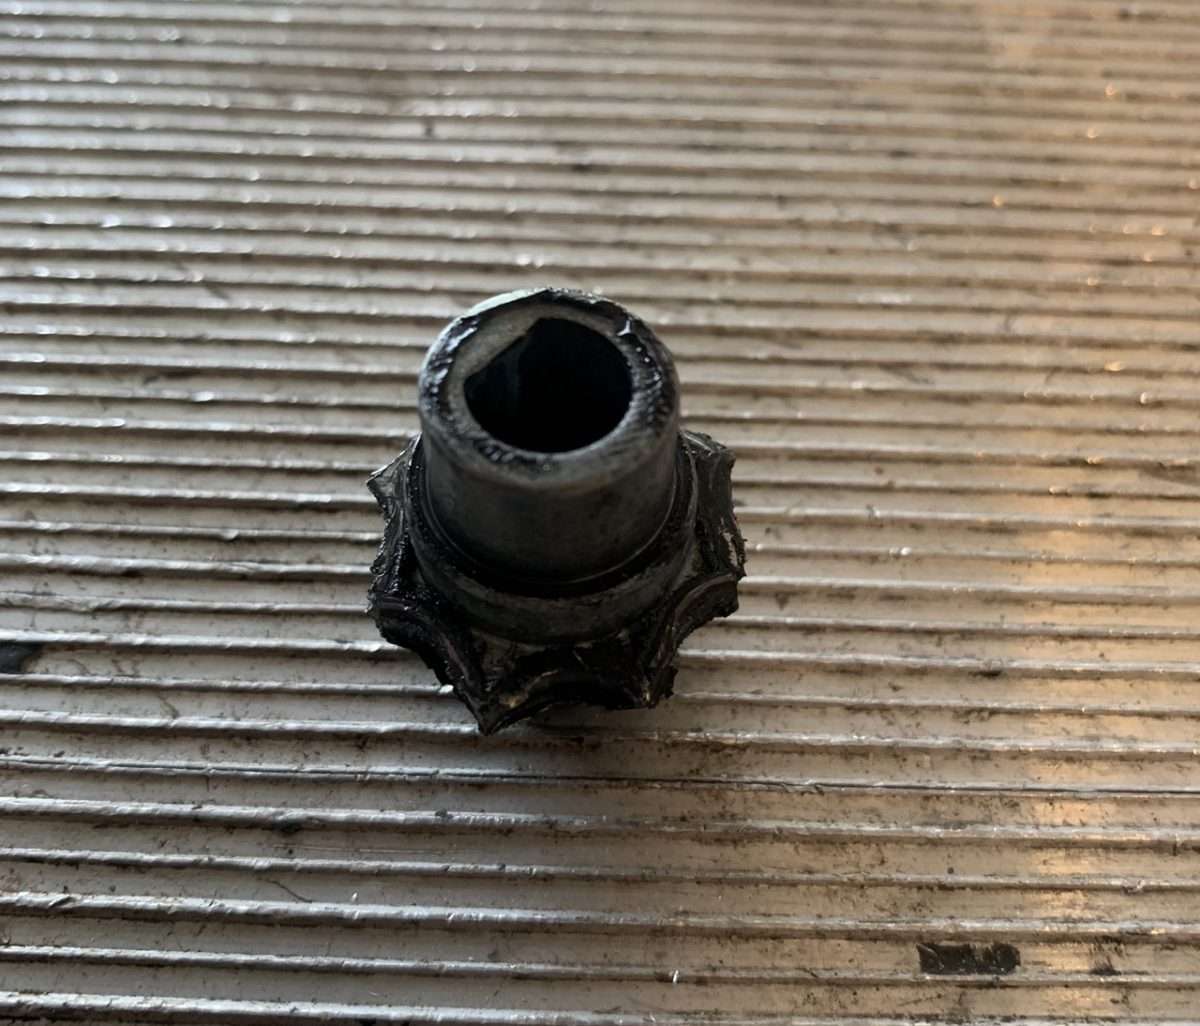
When inspecting the chain drive sprocket on top of your garage door opener, you may notice all the teeth are missing. This will definitely cause the chain to sag, and it will throw off your limit settings because the chain is slipping. This part will need to be replaced.
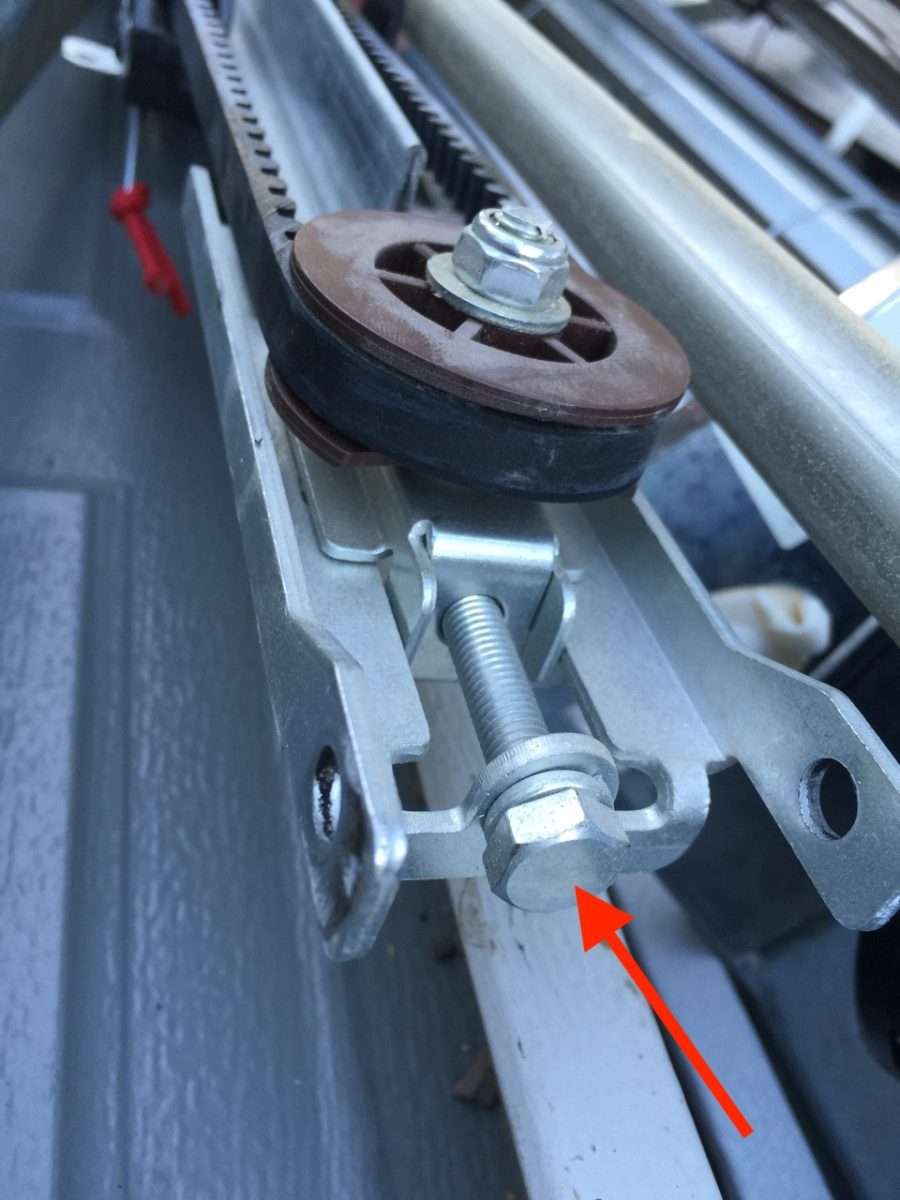
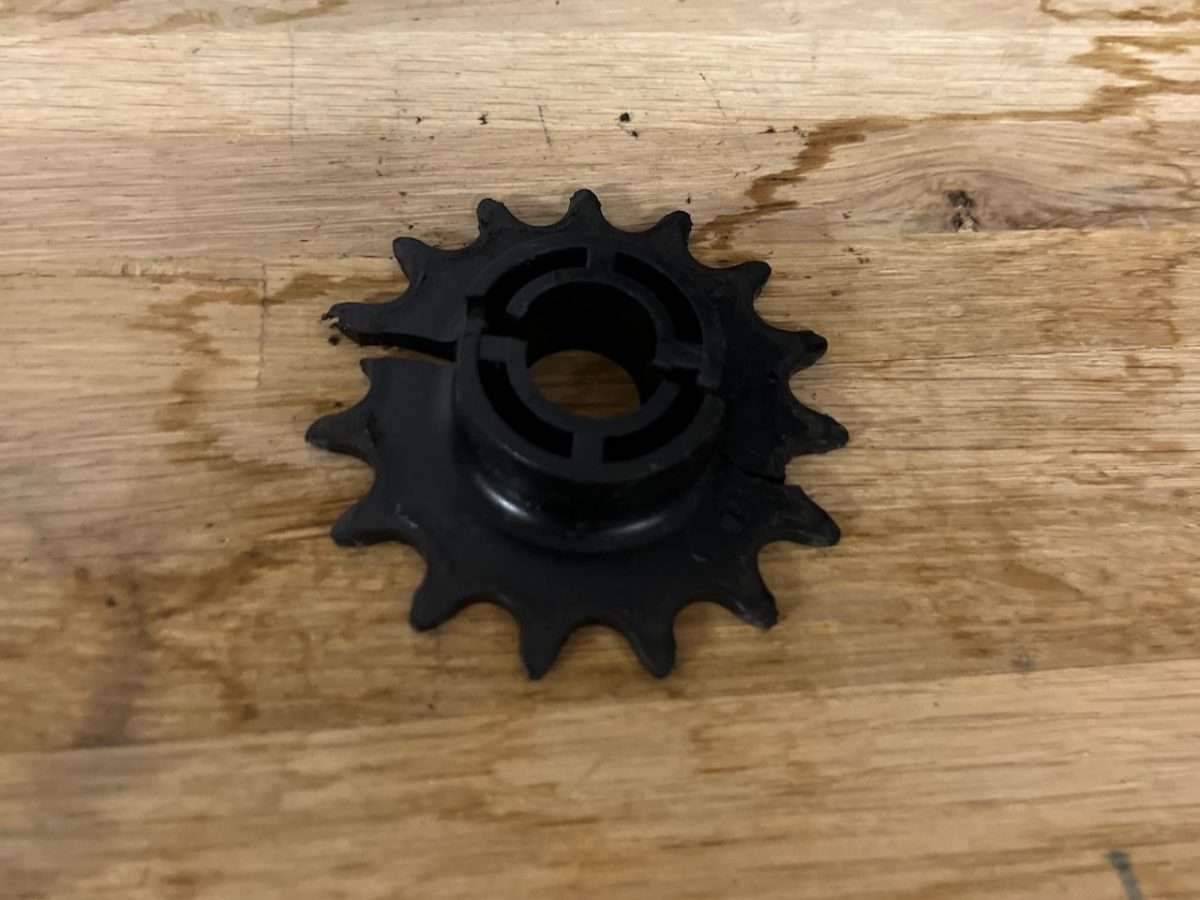
Front Chain Pulley is Cracked or Missing
The last thing I would check if the chain on your garage door opener keeps getting loose is the front pulley. All openers with chains, belts, and cables have a front pulley that is usually made of plastic on newer openers.
If this pulley is cracked or missing altogether, your chain will sag. This part will need to be replaced immediately, so you don’t further damage any other parts or your door.
Chain Came Off Garage Door Opener

If the chain has come completely off on your garage door opener, you most likely have a failed drive sprocket on top of the motor. This is common around the 8-12 year mark with openers due to natural wear and tear. The drive sprocket or complete gear assembly will need to be replaced depending on your model.
Lubricating Garage Door Chain and Rail
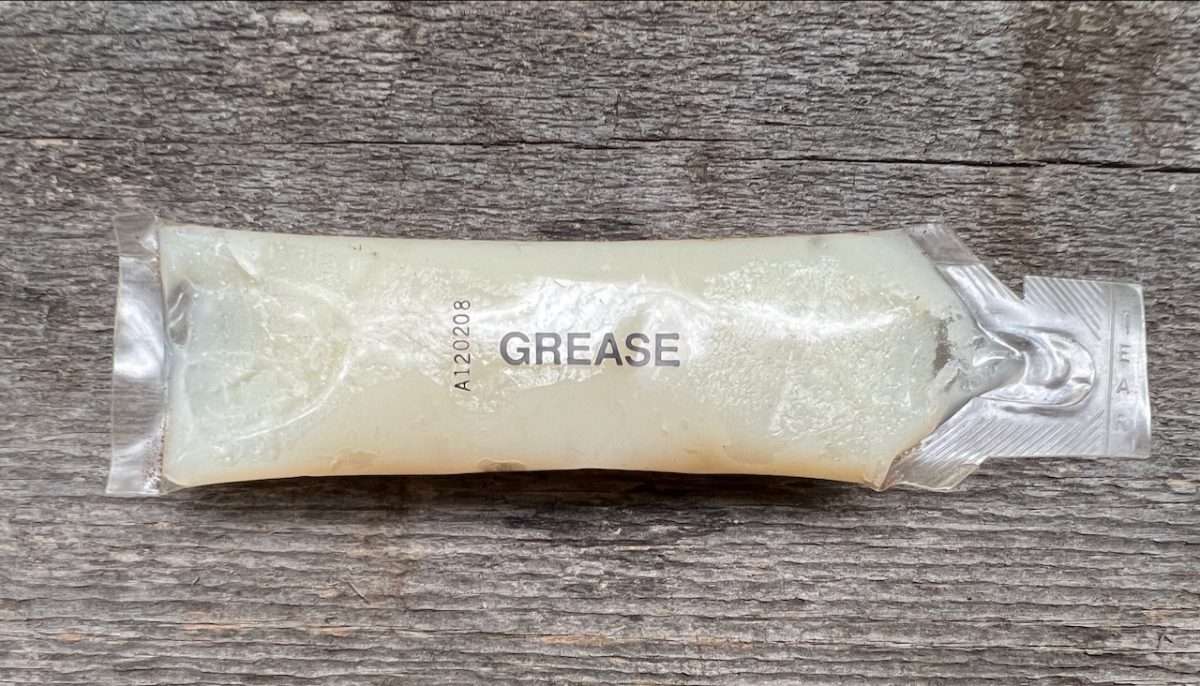
The best way to lubricate a garage door chain or rail is with some basic low temp grease. You want to make sure to lightly apply the grease, as a little goes a long way. You can use spray lubricants as well, but they do have a tendency to drip down onto vehicles or the floor.
Can You Use Wd-40 on a Garage Door Chain?
Do not use WD-40 to lubricate anything on your garage door or opener. WD-40 is not a lubricant, and it will strip off any oil or grease you have on metal components. This is why it’s so good at removing thick substances like tar.
We wrote a more extensive article that explains what should be used to lubricate a garage door.
How Often Do You Lubricate a Garage Door Chain?
A garage door chain or rail can be lubricated once a year if needed. Lubrication of any mechanical parts is highly dependent on usage and the climate you live in.
How to Reattach a Garage Door Chain
If the chain has come off your garage door opener because of binding or contact with the door, it may just need to be reinstalled. This first involves loosening the chain tensioner completely.
Once the tensioner is loose, you can install the chain around the sprocket and reinstall the tensioner into the trolley inner slide. You can now tighten the chain, so it’s about 1/4” above the bottom of the rail in the middle.
PRO TIP: Verifying Travel Limits
Whenever you are installing a chain or belt on a garage door opener, you need to know where the travel limits are. On newer openers with electronic limits, this won’t make a difference. But, it does with older openers with manual limits.
Travel limits determine which way the opener will start to run on the next cycle. For instance, brown is down and yellow is up on a Chamberlain opener. If the travel limit is touching brown, you need to make sure the trolley inner slide is in the down position when reinstalling a belt or chain. Otherwise, your limits will be set backwards.
How Long Does a Garage Door Chain Last?
We have never really seen a garage door chain fail. Other parts are on your opener like drive gears, sprockets, front pulleys, and carriages will fail before the chain will. We have seen the cable fail on garage door openers that are 50/50 chain and cable. With that being said, it takes a long time for the cable to wear out.
How Much to Replace a Garage Door Chain?
If you are replacing the chain on your garage door opener yourself, you can expect to pay around $40-$70 for the part, depending on where you purchase from. If you are having a garage door company replace the chain, you can expect to pay around $140-$200 depending on your location.
Can a Loose Chain Cause a Garage Door Not to Close?
In most cases, a loose opener chain will not prevent a garage door from closing. If your door is not closing, it is most likely related to the safety sensors not being aligned. Misaligned or blocked safety sensors is the most common phone call we receive and the number one reason for a garage door not closing.
Linear LDCO800 Chain Rattling
We have installed hundreds of Linear garage door openers over the years with great success. Then, we started having issues with chains rattling. The chain rails are pre-tensioned from the factory when we get them.
We have received phone calls from customers anywhere from a few days after installing a new opener up to three years later. The complaint is always the same, obnoxious rattling of the chain on a Linear LDCO opener. The fix for this is to usually loosen the chain a bit, but occasionally, you have to tighten it.
Loose Belt on Garage Door Opener
In general, belts on garage door openers don’t last as long as chains. You can expect around ten years of service before you have to replace the drive belt. With that being said, the drive sprockets on belt openers typically last longer than with chain drive units.
Belt Sagging on One Side?
If the belt on your garage door opener is sagging on one side, it is typically because your door is hitting the ground too hard. First, try backing off on the down travel limit and see if this resolves your issue.
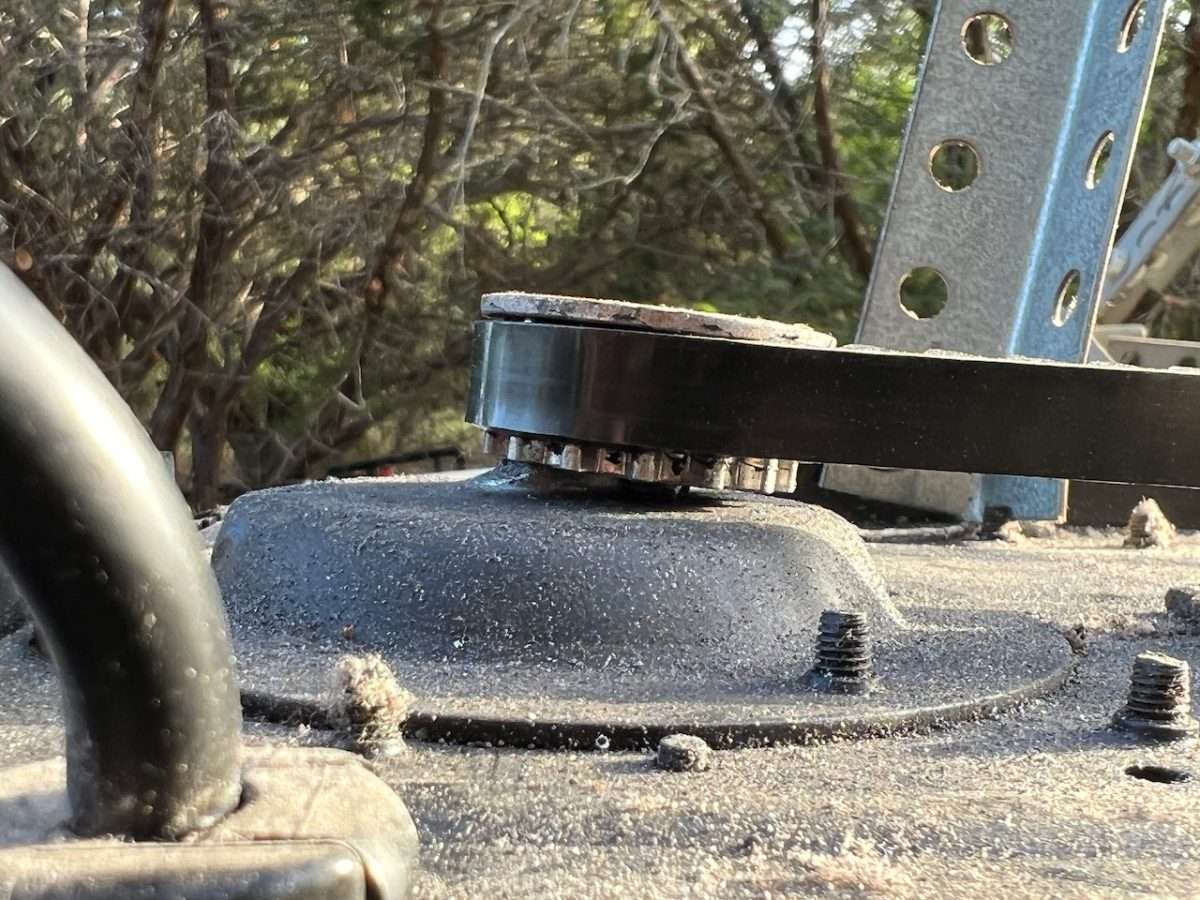
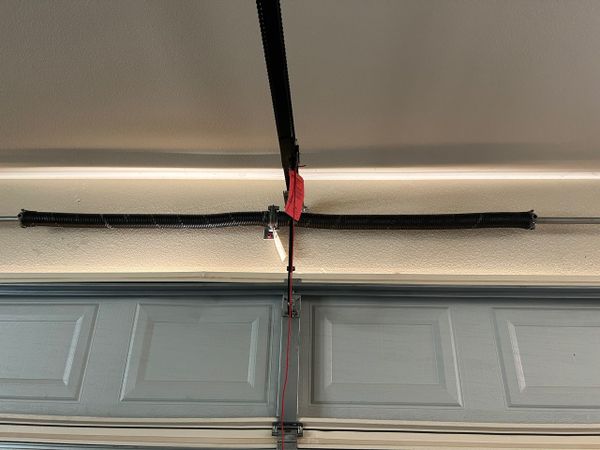
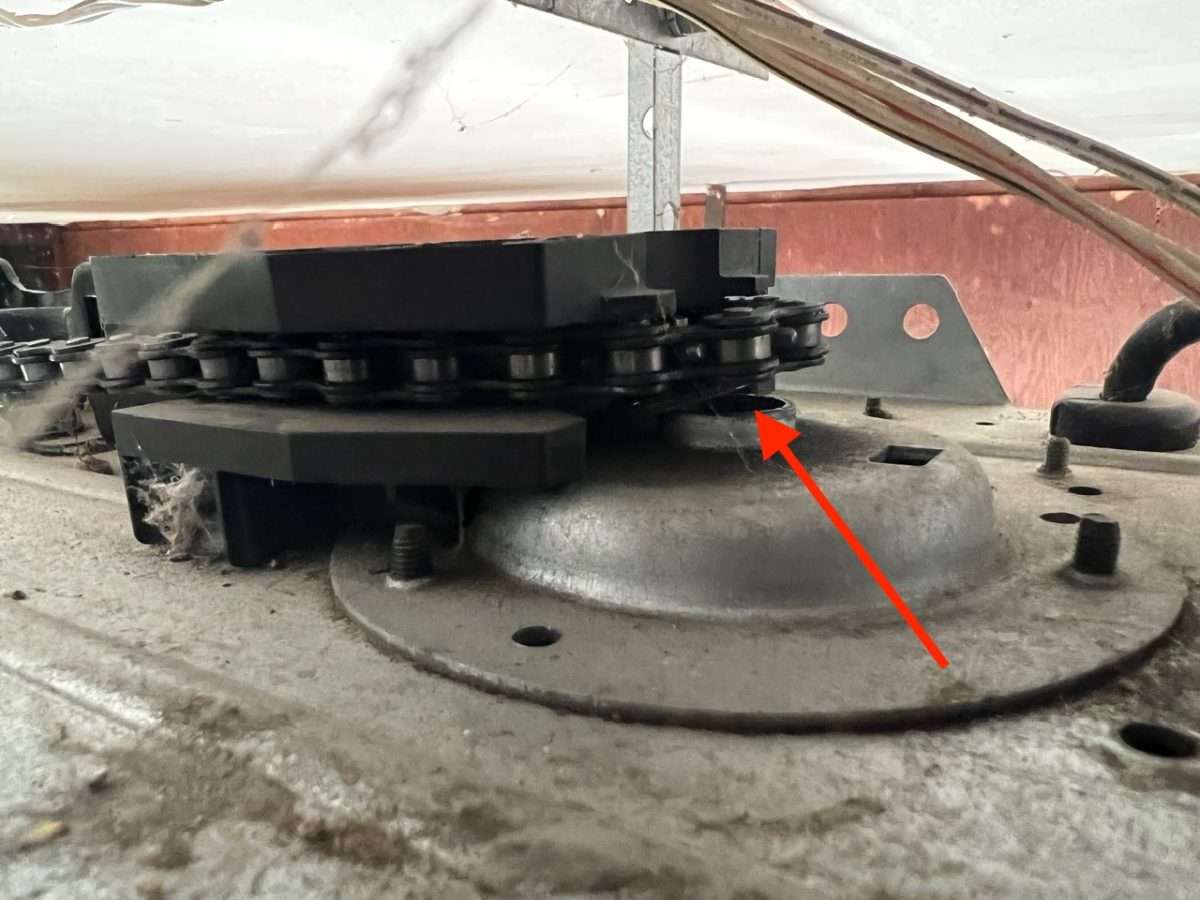
The other reason the belt could be sagging is that the drive sprocket on top of the motor is failing. Like in the picture above, the bushings have failed in the drive sprocket shaft, causing it to lean toward the garage door. This will cause your belt to sag.
How Tight Should a Garage Door Belt Be?
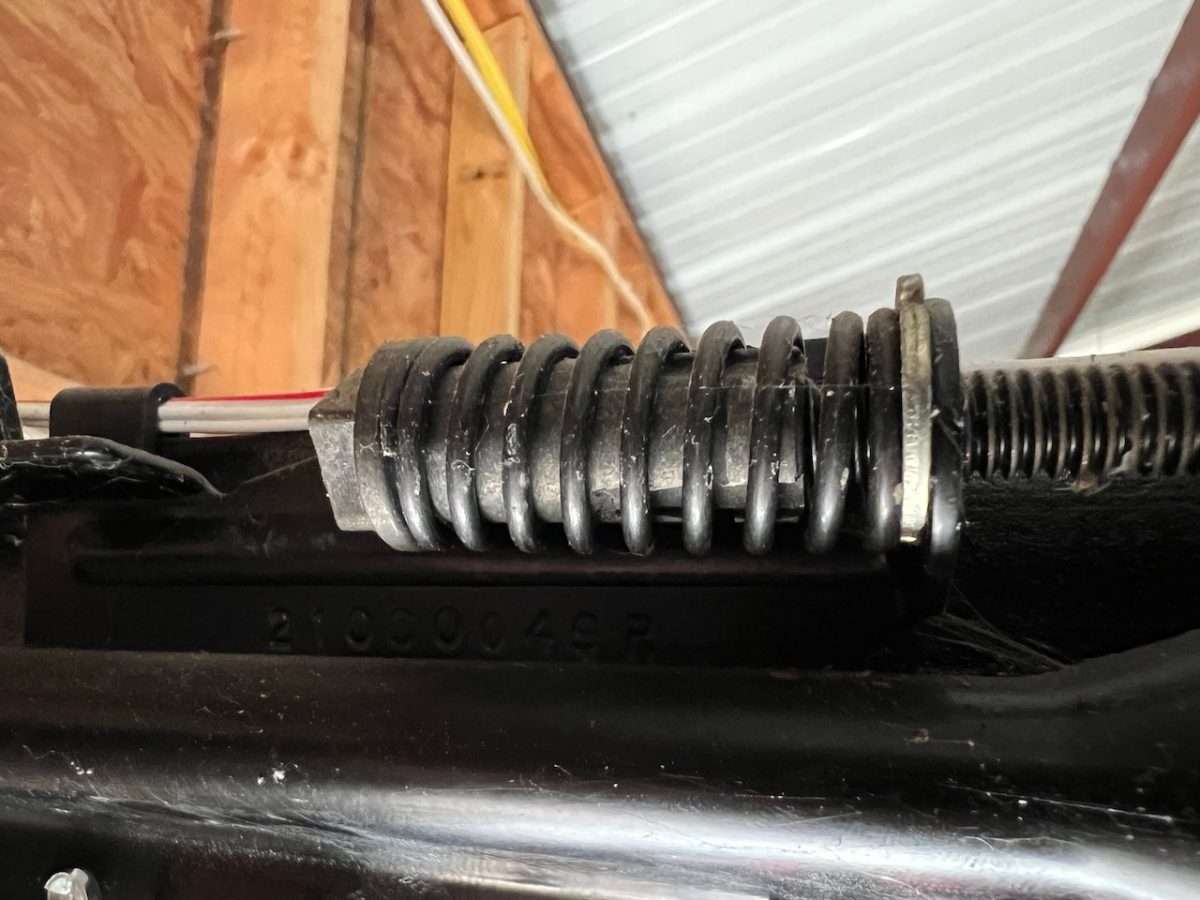
When tightened properly, the width of the spring on a LiftMaster, Chamberlain, or Craftsman belt drive opener should measure 1 1/4” when it’s released. Notice I said, “when it’s released”. Let’s take a closer look at the Pro Tip below.
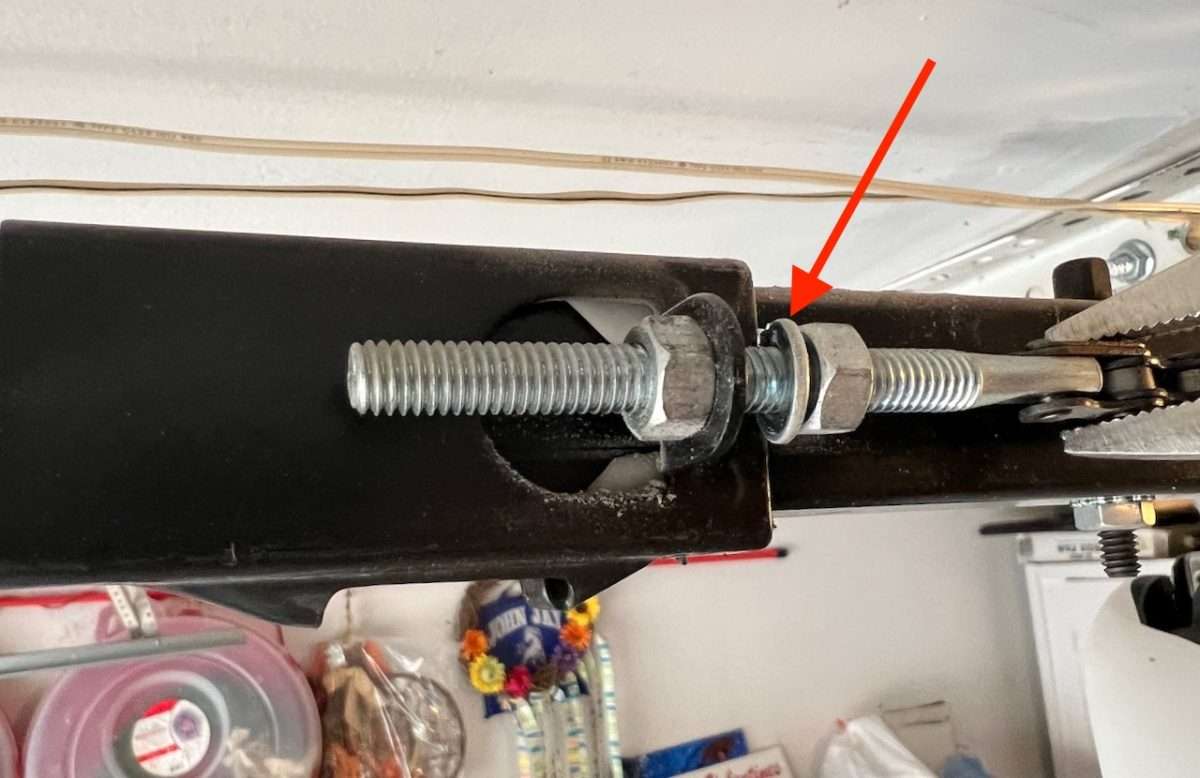
PRO TIP: Releasing the Spring
We have seen may belt drive openers installed without the spring being released. This is an important step that must be completed during installation, or you will continually have issues with a loose belt on your opener.
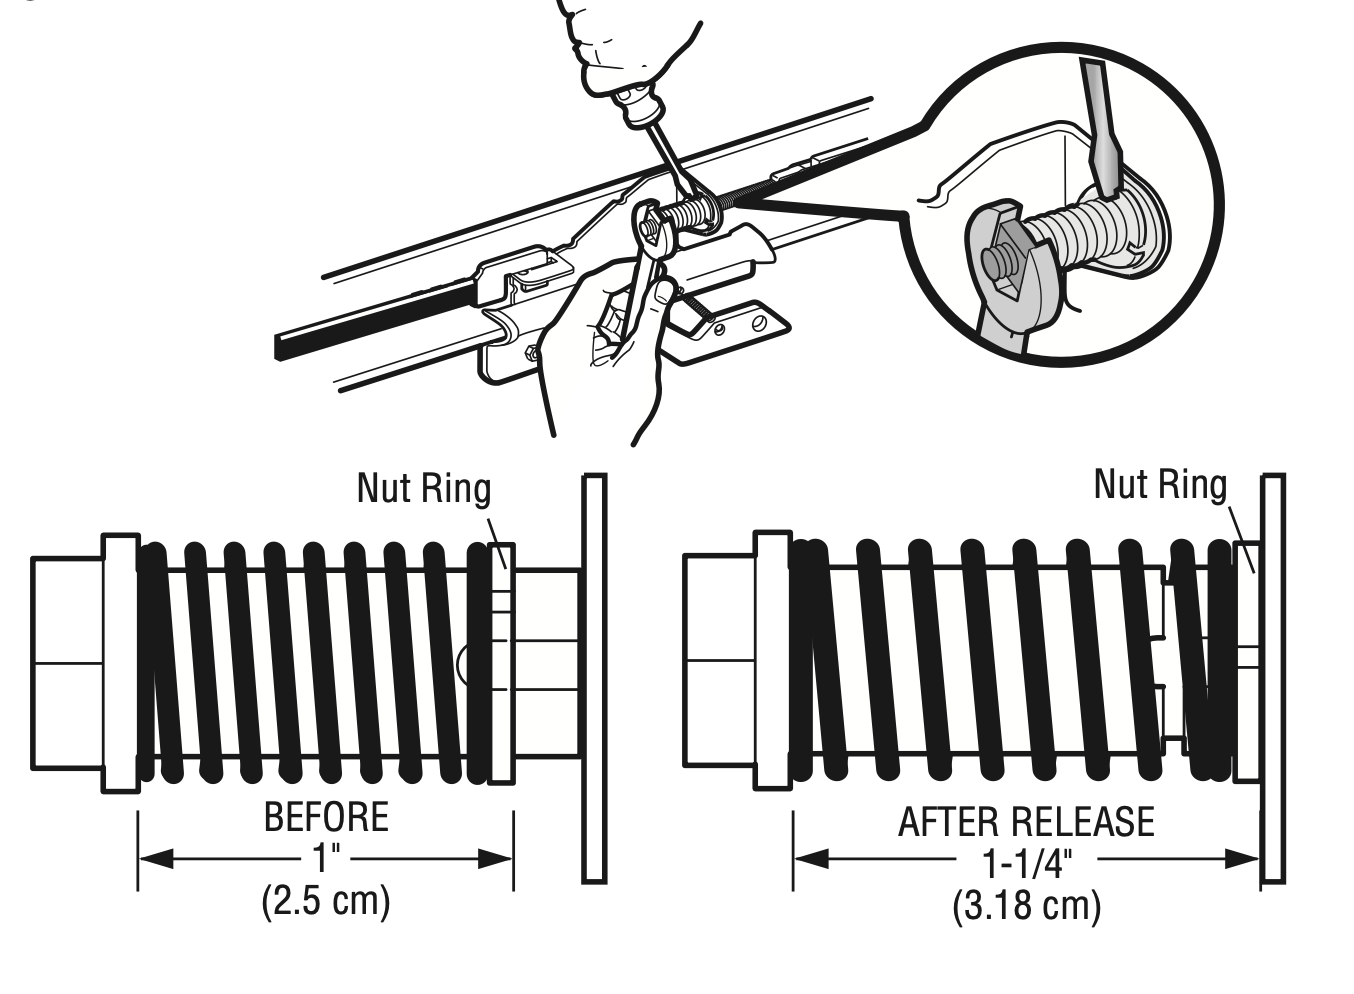
You will need an open end wrench along with a flat head screw drive to release the spring. The flat head screwdriver is used to hold the nut ring while you turn the square end with the open end wrench. All you require is about 1/4-1/2 of a turn and the spring will release.
Cracked Front Belt Pulley
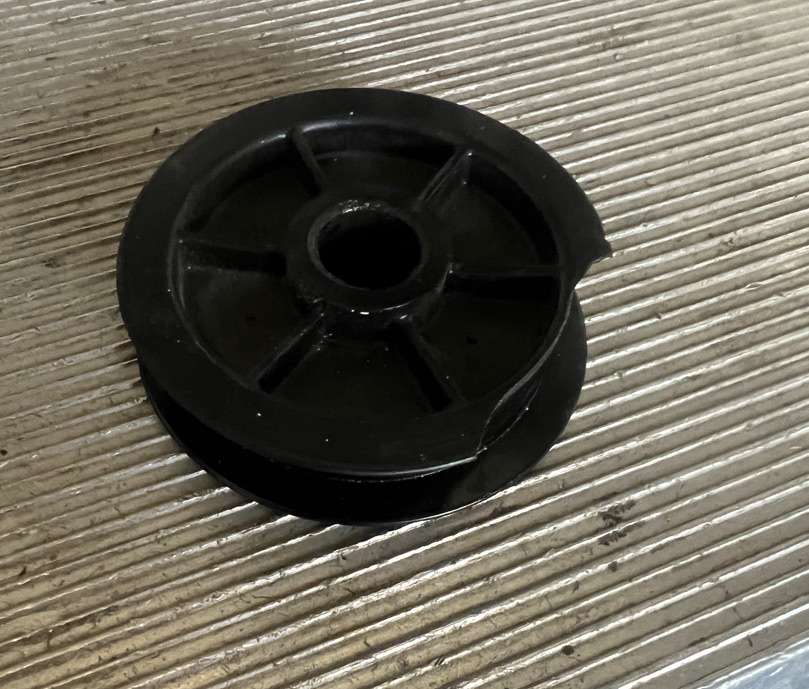
If the front pulley on your belt drive opener is cracked or completely missing, your belt will sag or come off completely. A cracked pulley can also damage your belt if it is getting caught on the rough edges during operation. This part is always overlooked when diagnosing belt issues on openers.
Stripped Drive Belt
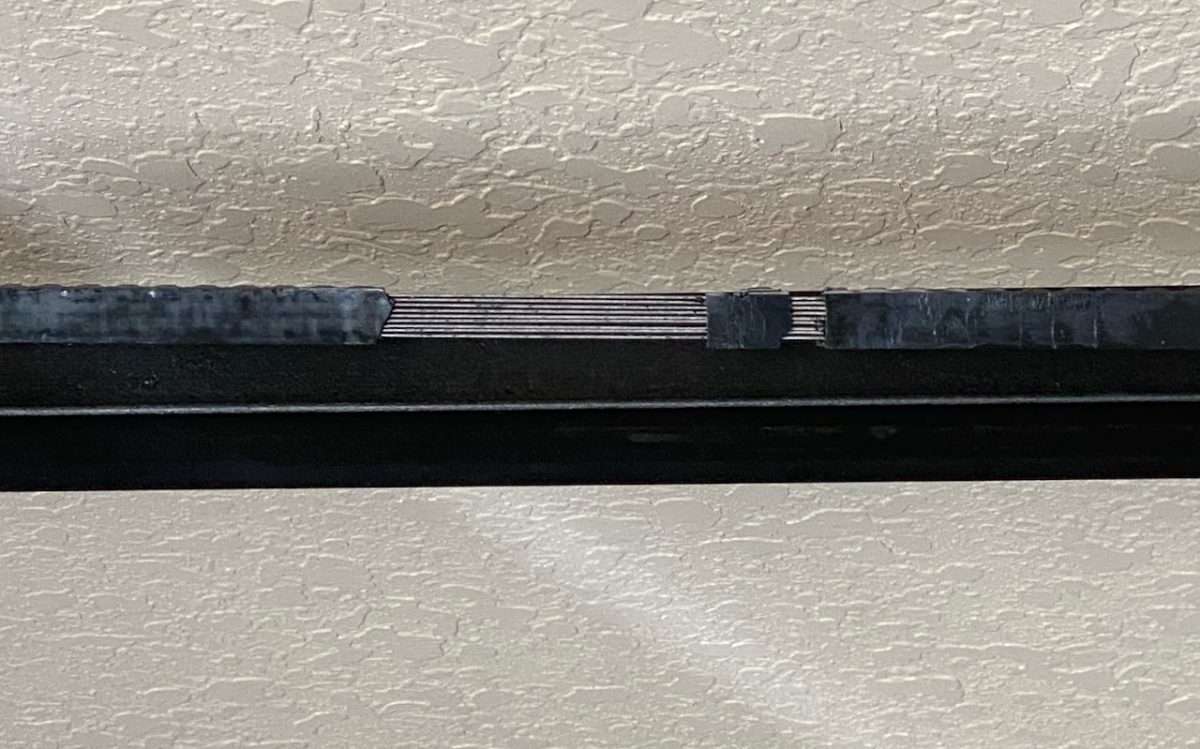
One more thing to look for if you are having issues with the belt on your opener is to make sure the belt is intact. By quickly looking up or getting on a step stool, you can visually inspect the belt to make sure no cogs are missing, or the steel belt is not showing. If so, the belt on your garage door opener will need to be replaced.
How Much to Replace a Garage Door Opener Belt?
A new replacement belt for your automatic opener will run you around $70-$110 depending on where you purchase it from. If you are having a garage door company replace the belt, you can expect to pay around $180-$240 depending on your location.
Unplug the Opener
PRO TIP
Whenever you are working on a automatic garage door opener, you should always unplug the unit for safety reasons. This prevents anyone from coming home and activating the garage door from a remote, which could knock you off a ladder.
Conclusion
Because the garage door is now the main entry point into the home, a properly running automatic opener is more important than ever. The tips in this article will help you diagnose any issues you have with a loose chain or belt on your garage door opener.
Whether you diagnose and repair yourself or call a company, being equipped with the proper knowledge will go a long way in making sure your problem is resolved in a timely, cost-effective manner.